Table of Contents
In the world of web development, having the right tools can make all the difference. Whether you’re just starting out or you’re a seasoned developer, XAMPP is a must-have tool for your toolkit. It’s an all-in-one solution that simplifies the process of setting up a local web server, allowing you to focus on what you do best: coding. In this guide, we’ll walk you through the steps to install XAMPP in just a few minutes.
What is XAMPP?
XAMPP is a open-source cross-platform and free web server solution stack package developed by Apache Friends. It includes Apache HTTP Server, MySQL, and interpreters for scripts written in PHP and Perl. Essentially, XAMPP provides everything you need to set up a local development environment on your computer.
Benefits of Using XAMPP
- Ease of Use: XAMPP is designed to be easy to install and use, even for beginners.
- All-in-One Package: It includes all the components needed to run a web server, eliminating the need to install and configure each component separately.
- Cross-Platform: XAMPP is available for Windows, macOS, and Linux, making it a versatile tool for developers using different operating systems.
System Requirements for XAMPP
Before you install XAMPP, it’s important to ensure that your system meets the minimum requirements.
Minimum System Requirements For XAMPP
- Operating System: Windows, macOS, or Linux
- Processor: Intel Pentium 4 or later
- Memory: 512 MB of RAM
- Hard Disk: 1 GB of free space
Recommended Specifications For XAMPP
- Operating System: Latest version of Windows, macOS, or Linux
- Processor: Dual-core processor or better
- Memory: 2 GB of RAM or more
- Hard Disk: 2 GB of free space
Downloading XAMPP
The first step to installing XAMPP is to download the appropriate version for your operating system.
Choosing the Right Version of XAMPP
Visit the official XAMPP website and choose the version that matches your operating system. XAMPP offers different versions for PHP, so select the version that suits your development needs.
Step-by-Step Download Process For XAMPP

- Go to the XAMPP download page.
- Select your operating system (Windows, macOS, or Linux).
- Choose the PHP version you need.
- Click on the “Download” button and start downloading xampp on your PC.
Installing XAMPP on Windows
Pre-Installation Steps of XAMPP
Before installing XAMPP on Windows, it’s a good idea to disable any firewall or antivirus software temporarily, as these can interfere with the installation process.
Installation Guide For XAMPP
- Run the Installer: Locate the downloaded XAMPP installer file and double-click to run it.
- User Account Control: If prompted by User Account Control, click “Yes” to allow the installation.
- Setup Wizard: The XAMPP setup wizard will launch. Click “Next” to proceed.
- Select Components: Choose the components which you want to install as per your requirement. For most users, the default selection is sufficient to use as per requirement. Click “Next.”
- Installation Folder: Choose the installation directory. The default path is usually fine. Click “Next.”
- Bitnami for XAMPP: You may be asked to install Bitnami for XAMPP. This step is optional and you can be skipped if not needed. Click “Next.”
- Ready to Install: Click “Next” to begin the installation process.
- Installation Complete: Once the installation is complete, you will see a confirmation screen. Click “Finish” to close the setup wizard.
Post-Installation Setup of XAMPP
After installing XAMPP, it’s important to configure it properly. Start the XAMPP Control Panel and make sure Apache and MySQL services are running.
Installing XAMPP on macOS
Pre-Installation Steps For XAMPP
Ensure that you have administrative privileges on your macOS device. You may also want to disable any firewall or antivirus software temporarily.
Installation Guide For XAMPP
- Run the Installer: Open the downloaded XAMPP disk image (.dmg) file.
- Setup Wizard: Drag the XAMPP application to the Applications folder.
- Launch XAMPP: Go to the Applications folder and double-click on XAMPP to launch it.
- Grant Permissions: You may need to grant administrative permissions. Enter your macOS username and password if prompted.
Post-Installation Setup For XAMPP
Open the XAMPP Control Panel from the Applications folder. Start Apache and MySQL to verify that the installation was successful.
Installing XAMPP on Linux
Pre-Installation Steps For XAMPP
Make sure you have root or sudo access on your Linux machine. Disable any firewall or antivirus software temporarily if necessary.
Installation Guide For XAMPP
- Open Terminal: Navigate to the directory where the XAMPP installer is located.
- Make the Installer Executable: Run
chmod +x xampp-linux-x64-7.4.22-0-installer.run(replace the filename with your version). - Run the Installer: Execute the command
sudo ./xampp-linux-x64-7.4.22-0-installer.run. - Setup Wizard: Follow all instructions to complete the installation.
Post-Installation Setup For XAMPP
Launch the XAMPP Control Panel by running sudo /opt/lampp/lampp start in the terminal. Check that Apache and MySQL services are running.
Starting XAMPP for the First Time
Initial Configuration of XAMPP
When you start XAMPP for the first time, you might need to configure a few settings. Open the XAMPP Control Panel and click on the “Config” button next to Apache and MySQL to adjust settings like ports and security.
Running Apache and MySQL on XAMPP
Click the “Start” button next to Apache and MySQL in the XAMPP Control Panel. If both services start without any errors, your XAMPP installation is working correctly.
Troubleshooting Common Issues with XAMPP
If you encounter issues, check the XAMPP logs for detailed error messages. Common problems include port conflicts and missing dependencies. Adjusting settings in the configuration files often resolves these issues.
Using the XAMPP Control Panel
Overview of the XAMPP Control Panel
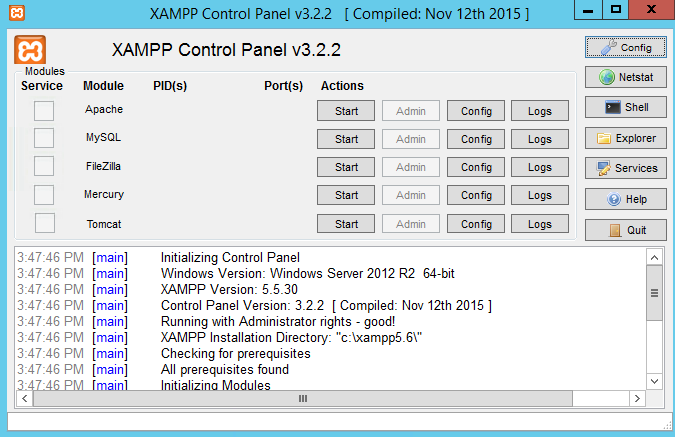
The XAMPP Control Panel is a user-friendly interface that allows you to manage the various components of your XAMPP installation. You can start, stop, and configure Apache, MySQL, and other services.
Managing Services For XAMPP
Use the Control Panel to start and stop services as needed. The “Config” buttons allow you to modify the configuration files for each service.
Advanced Features of XAMPP
Explore advanced features like setting up virtual hosts, configuring SSL, and managing PHP settings through the Control Panel.
Creating Your First PHP Project on XAMPP
Setting Up a Project Directory on XAMPP
Create a new directory for your project in the htdocs folder inside the XAMPP installation directory. This folder will serve as the root directory for your web project.
Writing a Simple PHP Script
Create a new first file named as index.php in your project directory. Open it with a text editor and add the following code:
<?php
    echo "Hello, world!";
?>
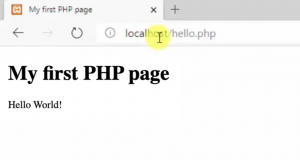
Running Your Script in the Browser
Open your web browser and navigate to http://localhost/your_project_directory. You should see the message “Hello, world!” displayed on the screen.
Managing Databases with phpMyAdmin in XAMPP
Accessing phpMyAdmin on XAMPP
phpMyAdmin option is a web-based interface for managing MySQL databases. To access it, go to http://localhost/phpmyadmin in your browser.
Creating a New Database using XAMPP
In phpMyAdmin, click on the “Databases” tab. Enter a database name for your new database and click “Create.”
Managing Tables and Data
Use phpMyAdmin to create tables, insert data, and run SQL queries. The intuitive interface makes database management straightforward.
Securing Your XAMPP Installation
Essential Security Tips For XAMPP
To secure your XAMPP installation, follow these best practices:
- Change default passwords for MySQL and phpMyAdmin.
- Disable remote access to services.
- Use a firewall to restrict access to your local server.
Configuring Security Settings For XAMPP
Edit the configuration files for Apache and MySQL to enhance security. For example, you can restrict access to certain directories and enable SSL for secure connections.
Best Practices for Secure Development
Always validate and sanitize user inputs in your PHP scripts to prevent SQL injection and other security vulnerabilities. Keep your xampp software up to date with the latest security patches.
Common Issues and Solutions
Troubleshooting Installation Problems
If you encounter problems during installation, make sure you have the necessary permissions and that no other software is using the same ports.
Fixing Service Errors
Check the logs for Apache and MySQL to identify the cause of any errors. Common issues include misconfigured settings and port conflicts.
Handling Port Conflicts
If another application is using the same port as Apache or MySQL, you can change the port number in the configuration files.
Uninstalling XAMPP
When and Why to Uninstall XAMPP
You might need to uninstall XAMPP if you’re switching to a different development environment or if you need to perform a clean installation.
Step-by-Step Uninstallation Process For XAMPP
- Stop All Services: Open the XAMPP Control Panel and stop all running services.
- Run the Uninstaller: Navigate to the XAMPP installation directory and run the uninstaller program.
- Delete Remaining Files: Manually delete any remaining files and directories related to XAMPP.
Conclusion | XAMPP
Installing XAMPP is a quick and easy way to set up a local web development environment. With its comprehensive package of tools, you can start building and testing web applications in no time. Follow the steps outlined in this guide, and you’ll have XAMPP up and running in minutes. Happy coding!
FAQs | XAMPP
What is XAMPP used for?
XAMPP is used to set up a local web server environment on your computer, allowing you to develop and test web applications without needing an internet connection.
Is XAMPP free to use?
Yes, XAMPP is free and open-source, making it accessible to anyone who wants to use it for web development.
Can I use XAMPP for production?
While XAMPP is great for development and testing, it’s not recommended for production use due to security concerns. For production, consider using a more secure setup.
How do I update XAMPP?
To update XAMPP, you’ll need to download the latest version from the official website and follow the installation instructions. Always make sure before update, to back up your data before updating.
What are the alternatives to XAMPP?
Alternatives to XAMPP include WampServer, MAMP, and LAMP. Each of these tools offers similar functionality for setting up a local web server environment.
Check out Unlock the Code: A Beginner’s Guide – 5 Easy Steps on How to Learn Python